平常写自动化用例会写一些前置的 fixture 操作,用例需要用到就直接传该函数的参数名称就行了。当用例很多的时候,每次都传返个参数,会比较麻烦。
fixture 里面有个参数 autouse,默讣是 Fasle 没开启的,可以设置为True 开启自动使用 fixture 功能,返样用例就丌用每次都去传参了调用 fixture 三种方法 1.函数或类里面方法直接传 fixture 的函数参数名称 2.使用装饰器@pytest.mark.usefixtures()修饰 3.autouse=True 自动使用
方法一:先定义 start 功能,用例全部传 start 参数,调用该功能

 import pytest
@pytest.fixture(scope='function') def start(request): print('\n=========开始执行function============') def test_a(start): print('=======用例a==========') class TestCase(): def test_01(self, start): print('=======用例01=========') def test_02(self, start): print('=======用例02=========') if __name__=='__main__': pytest.main() 方法二:使用装饰器@pytest.mark.usefixtures()修饰需要运行的用例 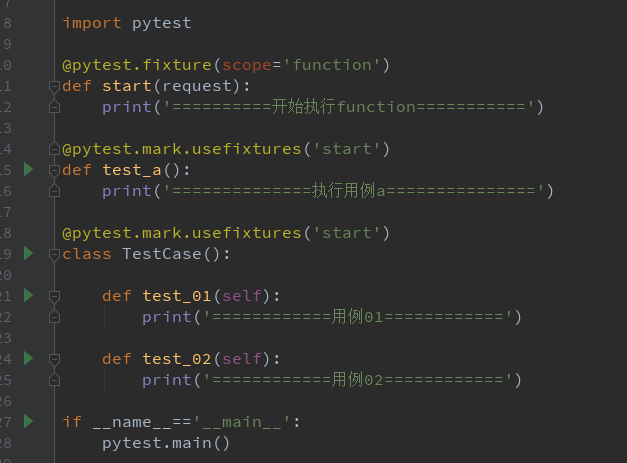
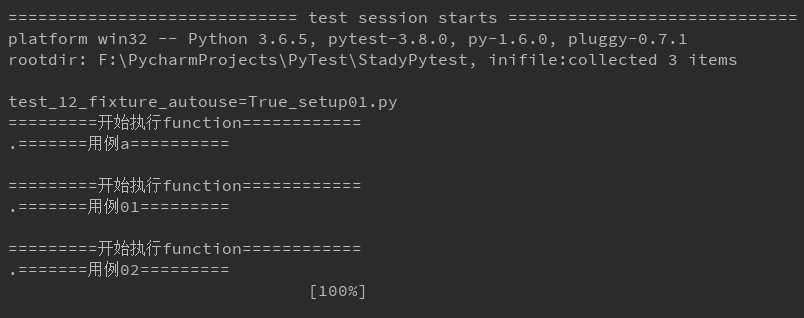
import pytest @pytest.fixture(scope='function') def start(request): print('==========开始执行function===========') @pytest.mark.usefixtures('start') def test_a(): print('==============执行用例a===============') @pytest.mark.usefixtures('start') class TestCase(): def test_01(self): print('============用例01============') def test_02(self): print('============用例02============') if __name__=='__main__': pytest.main()
方法三:autouse 设置为 True,自动调用 fixture 功能
1.start 设置 scope 为 module 级别,在当前.py 用例模块只执行一次,autouse=True 自动使用2.open_home 设置 scope 为 function 级别,每个用例前都调用一次,自动使用 
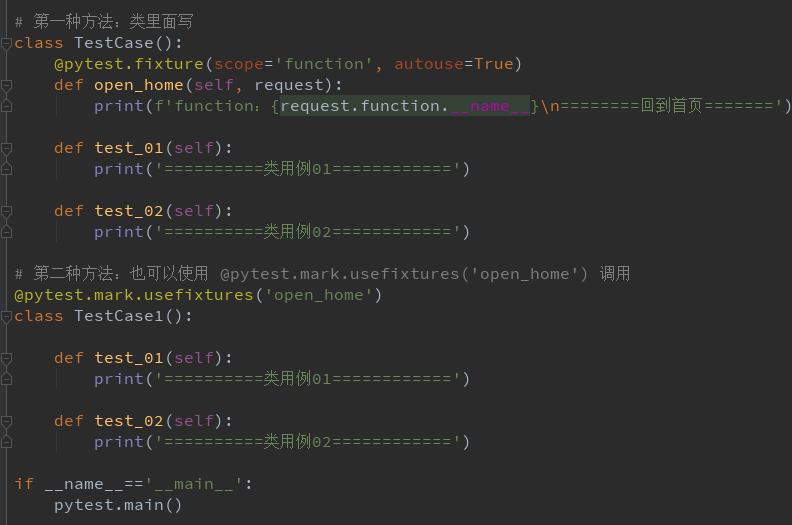
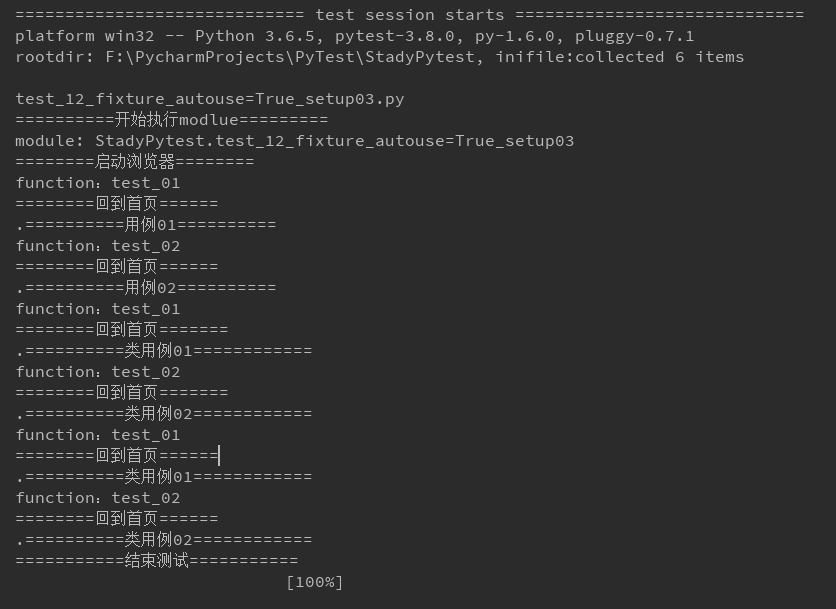
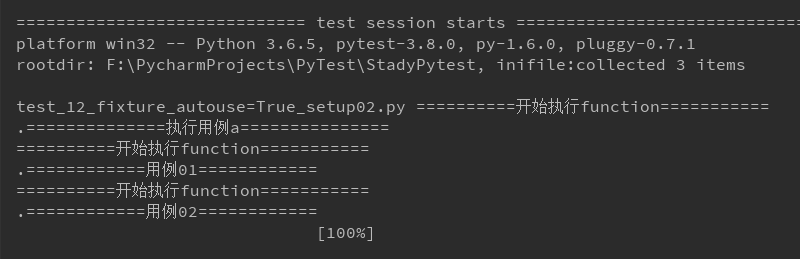
import time import pytest @pytest.fixture(scope='module', autouse=True) def start(request): print('\n==========开始执行modlue=========') print(f'module: {request.module.__name__}') print('========启动浏览器========') yield print('===========结束测试===========') @pytest.fixture(scope='function', autouse=True) def open_home(request): print(f'function:{request.function.__name__}\n========回到首页======') def test_01(): print('==========用例01==========') def test_02(): print('==========用例02==========') # 第一种方法:类里面写 class TestCase(): @pytest.fixture(scope='function', autouse=True) def open_home(self, request): print(f'function:{request.function.__name__}\n========回到首页=======') def test_01(self): print('==========类用例01============') def test_02(self): print('==========类用例02============') # 第二种方法:也可以使用 @pytest.mark.usefixtures('open_home') 调用 @pytest.mark.usefixtures('open_home') class TestCase1(): def test_01(self): print('==========类用例01============') def test_02(self): print('==========类用例02============') if __name__=='__main__': pytest.main()